Gregory's Blog
long meetins stink

Joshua Tree National Park


Joshua Tree National Park

This particular drive, comprising Park Blvd and Pinto Basin Road, is around 2 hours and ten minutes if you don't plan to stop and check out the park. However, you definitely will want to take your time on this drive as it is one of the most beautiful arid landscapes in the South West. 

The Joshua Tree, or Yucca brevifolia, only exist in the SouthWest. It thrives in grassland areas in the Mohave Desert above 1300 feet in elevation. It is a dense tree and has often been thought of as being the inspiration for the fictional Truffula trees in the Lorax by Dr. Suess.

Many people call the park the 'Land of Suess'. 

Like the Truffula Tree in Dr. Suess, the Joshua Trees are having a difficult time dealing with the consequences of global warming and suffer from smog and air pollution blowing into the area. This tree is also challenged by increased temperatures. The state of California is taking action however and the Joshua Tree is the first tree protected due to climate change.


Attractions


Cholla Cactus Garden Trail

This trail has a high concentration of Cholla Cacti, considered some of the cutest cacti in the world. This cactus has been nicknamed the teddy bear cactus- just make sure not to touch them! This is a very easy trail and is quite short making this a popular trail for families and children. 


Arch Rock Trail

Another short trail leads to an arch that spans nearly 30 feet. This trail is adjacent to a campground and is quite popular. There are other trail systems that branch off of the main trail if you want a longer hike.


Skull Rock

The skull rock trail is a 1.8 mile round trip loop with moderate elevation gain. Be sure to take sunscreen and some water with you as it can get quite hot and there is no shade. The rock itself is one of the more popular destinations and there is an abundant amount of wildflowers in bloom if you hike this in the right season. 


Hidden Valley

Hidden Valley, found right off of Park Blvd, is a one-mile self-guided trail and is one of the most popular trails in the park system. The beautiful rock formations provide opportunities for rock climbing and make this a very scenic trail. Due to the valley and it's location, the valley has a unique miro-habitat and has a wide variety of plants and animals not seen in the other areas of the park.  


Keys View

This is a fantastic view of the Coachella Valley and the Salton Sea and well worth the 20-minute drive down Keys View Road. This valley was created by the infamous San Andreas and San Jacinto Faults which created the mountains and deep valleys in the area. San Jacinto Peak, the mountain behind Palm Springs, has one of the abrupt and steepest inclines in North America and these faults are capable of producing major earthquakes.


This entry was posted on June 21, 2022 at 11:33 PM and has received 291 views.

Using ColdFusion to Synchronize Time Across Time Zones


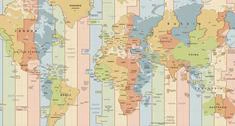
ColdFusion has plenty of date/time functions, however, it is lacking a robust set of native functions to calculate time stamps across time zones. Thankfully ColdFusion has a vibrant open-source community. In this article, I will walk you through the process of converting the client timestamp to the timestamp on the server for a given timezone using TimeZone.cfc.


Real-World Scenario

Galaxie Blog allows the author to select a post date in the past or in the future. When a future date is selected, Galaxie Blog will create a scheduled task to send the post to the subscriber base via email. However, we must convert the post date in the author's time zone to the proper time in the time zone of the server. We need to make sure that the emails are sent out at the right time if the time zones are different between the author and the server. To accomplish this we will use an open-source library, TimeZone.cfc.


Real World Example

Click the button below to see this example in action.


TimeZone.cfc

TimeZone.cfc is a small ColdFusion component that has many different methods to convert timestamp information between various timezones. This component allows for robust time zone conversion using Java's  java.util.TimeZone class.

It can be found on GitHub at https://github.com/rip747/TimeZone-CFC. However, the current version of TimeZone.cfc has a small bug caused by a nested comment and a small bug with CF2021.

I documented these bugs and made proposed changes on the original TimeZone repo and have forked my own TimeZone.cfc at https://github.com/GregoryAlexander77/TimeZone-CFC. Once you have downloaded the cfc you will need to upload it to the server. In this example, I placed the cfc in /blog/common/cfc/TimeZone.cfc.


Server-side function to convert a selected date and timezone between the client and the server

I created the following function to convert the timestamp on the client's device to the time found on the server. This is the same function that I am using in the demo below.

The required arguments are the date and time selected by the user, along with the author's time zone.

The TimeZone's getServerId() retrieves the time zone string found on the server. My server, hosted by Hostek, has the following identifier  'America/Chicago'.

Code on the client-side is sending the Time Zone's GMT Offset that the user selected. GMT is Greenwich Mean Time and is the time displayed by the Shepherd Gate Clock at the Royal Observatory in Greenwich, London. The GMT Offset is a numeric value that is used to determine the time from the GMT and is a string like so '-8'. If it is noon in London, you would subtract 8 hours to find the time in the Pacific Time Zone, which would be 4 AM, for example.

TimeZone cfc takes this offset value and extracts a list of time zone identifiers. The time zone identifier for my location is 'America/Los_Angeles' but you can select your own.

As there are many time zone identifiers for a given GMT Offset (-8 for example), and the blogTimeZoneList[1] code picks the first value found in this list. It is better to use the Time Zone Identifiers instead of calculating it using GMT Offset, but here we are using the GMT Offset for this example.

Near the bottom of the function, the convertTz function takes the date and timezone selected by the user and converts it to the date on the server. See the documentation in the TimeZone.cfc for more information.

<cffunction name="getServerDateTime" access="remote" returntype="date" returnformat="json" output="true"
		hint="Takes a date from the client and returns the date that it should be on the Server. This is used to schedule tasks on the server from the front end.">
	<cfargument name="selectedDate" type="date" required="true" />
	<cfargument name="selectedTime" type="date" required="true" />
	<cfargument name="timeZone" type="string" required="true" />

	<cfset thisDate = selectedDate & ' ' & selectedTime>

	<!--- Invoke the Time Zone cfc --->
	<cfobject component=".blog.common.cfc.TimeZone" name="TimeZoneObj">

	<!--- Get the time zone identifier on the server (ie America/Los_Angeles) from the TimeZone component --->
	<cfset serverTimeZoneId = TimeZoneObj.getServerId()>
	<!--- Get the blog time zone offset (-8) from the database and is populated by the Blog Time interface. We probably should be storing the actual identifier (America/Los_Angeles) in the database in the future to get the proper DST --->
	<cfset blogTimeZone = arguments.timeZone>
	<!--- Get the time zone identifier (America/Los_Angeles) by the GMT offset. This will pull up multiple options, but we just need a working identifier and will select the first one.  --->
	<cfset blogTimeZoneList = TimeZoneObj.getTZByOffset(blogTimeZone)>
	<!--- Get the first value in the array. We don't need this to be accurate, we just need a valid identifier to use. --->
	<cfset blogTimeZoneId = blogTimeZoneList[1]>

	<!--- Now use the convertTZ function to convert the blog time to server time. The blog time is the time zone of the site administrator that is writing the articles. We may want to add time zones for all blog users with the edit post role in the future. 
	convertTz(thisDate,	fromTZ, toTZ) --->
	<cfset serverDateTime = TimeZoneObj.convertTZ(thisDate, blogTimeZoneId, serverTimeZoneId)>

	<!--- Return it. --->
	<cfreturn serverDateTime>

</cffunction>

Client-Side Code

The server-side code found above should be a useful introduction to this library for most users, but for clarity, I will also include the client-side code. The client-side code uses the Kendo Core library, but you can use normal dropdowns and date pickers on the client-side if you choose. 


Client-Side Javascript

The following Javascript creates the necessary data and functionality of the dropdowns on the client.

The Kendo Time Picker widget prompts the user to select a valid date/time.

The Time Zone dropdown displays the label in the tzInts Javascript array, for example '(GMT-12:00) International Date Line West' and extracts the GMT Offset found in the selected value.

The getServerDateTime function sends these values using Ajax to the getServerDateTime function (found above) on the server.

The serverDateTimeResult function returns the getServerDateTime value back to the client and populates the serverTime HTML form.

<script>

var todaysDate = new Date();

// Kendo Dropdowns
// Date/time picker			
$("#selectedDate").kendoDateTimePicker({
	componentType: "modern",
	value: todaysDate
});

var tzInts = [
	{"label":"(GMT-12:00) International Date Line West","value":"-12"},
	{"label":"(GMT-11:00) Midway Island, Samoa","value":"-11"},
	{"label":"(GMT-10:00) Hawaii","value":"-10"},
	{"label":"(GMT-09:00) Alaska","value":"-9"},
	{"label":"(GMT-08:00) Pacific Time (US & Canada)","value":"-8"},
	{"label":"(GMT-08:00) Tijuana, Baja California","value":"-8"},
	{"label":"(GMT-07:00) Arizona","value":"-7"},
	{"label":"(GMT-07:00) Chihuahua, La Paz, Mazatlan","value":"-7"},
	{"label":"(GMT-07:00) Mountain Time (US & Canada)","value":"-7"},
	{"label":"(GMT-06:00) Central America","value":"-6"},
	{"label":"(GMT-06:00) Central Time (US & Canada)","value":"-6"},
	{"label":"(GMT-05:00) Bogota, Lima, Quito, Rio Branco","value":"-5"},
	{"label":"(GMT-05:00) Eastern Time (US & Canada)","value":"-5"},
	{"label":"(GMT-05:00) Indiana (East)","value":"-5"},
	{"label":"(GMT-04:00) Atlantic Time (Canada)","value":"-4"},
	{"label":"(GMT-04:00) Caracas, La Paz","value":"-4"},
	{"label":"(GMT-04:00) Manaus","value":"-4"},
	{"label":"(GMT-04:00) Santiago","value":"-4"},
	{"label":"(GMT-03:30) Newfoundland","value":"-3.5"},
	{"label":"(GMT-03:00) Brasilia","value":"-3"},
	{"label":"(GMT-03:00) Buenos Aires, Georgetown","value":"-3"},
	{"label":"(GMT-03:00) Greenland","value":"-3"},
	{"label":"(GMT-03:00) Montevideo","value":"-3"},
	{"label":"(GMT-02:00) Mid-Atlantic","value":"-2"},
	{"label":"(GMT-01:00) Cape Verde Is.","value":"-1"},
	{"label":"(GMT-01:00) Azores","value":"-1"},
	{"label":"(GMT+00:00) Casablanca, Monrovia, Reykjavik","value":"0"},
	{"label":"(GMT+00:00) Greenwich Mean Time : Dublin, Edinburgh, Lisbon, London","value":"0"},
	{"label":"(GMT+01:00) Amsterdam, Berlin, Bern, Rome, Stockholm, Vienna","value":"1"},
	{"label":"(GMT+01:00) Belgrade, Bratislava, Budapest, Ljubljana, Prague","value":"1"},
	{"label":"(GMT+01:00) Brussels, Copenhagen, Madrid, Paris","value":"1"},
	{"label":"(GMT+01:00) Sarajevo, Skopje, Warsaw, Zagreb","value":"1"},
	{"label":"(GMT+01:00) West Central Africa","value":"1"},
	{"label":"(GMT+02:00) Amman","value":"2"},
	{"label":"(GMT+02:00) Athens, Bucharest, Istanbul","value":"2"},
	{"label":"(GMT+02:00) Beirut","value":"2"},
	{"label":"(GMT+02:00) Cairo","value":"2"},
	{"label":"(GMT+02:00) Harare, Pretoria","value":"2"},
	{"label":"(GMT+02:00) Helsinki, Kyiv, Riga, Sofia, Tallinn, Vilnius","value":"2"},
	{"label":"(GMT+02:00) Jerusalem","value":"2"},
	{"label":"(GMT+02:00) Minsk","value":"2"},
	{"label":"(GMT+02:00) Windhoek","value":"2"},
	{"label":"(GMT+03:00) Kuwait, Riyadh, Baghdad","value":"3"},
	{"label":"(GMT+03:00) Moscow, St. Petersburg, Volgograd","value":"3"},
	{"label":"(GMT+03:00) Nairobi","value":"3"},
	{"label":"(GMT+03:00) Tbilisi","value":"3"},
	{"label":"(GMT+03:30) Tehran","value":"3.5"},
	{"label":"(GMT+04:00) Abu Dhabi, Muscat","value":"4"},
	{"label":"(GMT+04:00) Baku","value":"4"},
	{"label":"(GMT+04:00) Yerevan","value":"4"},
	{"label":"(GMT+04:30) Kabul","value":"4.5"},
	{"label":"(GMT+05:00) Yekaterinburg","value":"5"},
	{"label":"(GMT+05:00) Islamabad, Karachi, Tashkent","value":"5"},
	{"label":"(GMT+05:30) Sri Jayawardenapura","value":"5.5"},
	{"label":"(GMT+05:30) Chennai, Kolkata, Mumbai, New Delhi","value":"5.5"},
	{"label":"(GMT+05:45) Kathmandu","value":"5.75"},
	{"label":"(GMT+06:00) Almaty, Novosibirsk","value":"6"},{"label":"(GMT+06:00) Astana, Dhaka","value":"6"},
	{"label":"(GMT+06:30) Yangon (Rangoon)","value":"6.5"},
	{"label":"(GMT+07:00) Bangkok, Hanoi, Jakarta","value":"7"},
	{"label":"(GMT+07:00) Krasnoyarsk","value":"7"},
	{"label":"(GMT+08:00) Beijing, Chongqing, Hong Kong, Urumqi","value":"8"},
	{"label":"(GMT+08:00) Kuala Lumpur, Singapore","value":"8"},
	{"label":"(GMT+08:00) Irkutsk, Ulaan Bataar","value":"8"},
	{"label":"(GMT+08:00) Perth","value":"8"},
	{"label":"(GMT+08:00) Taipei","value":"8"},
	{"label":"(GMT+09:00) Osaka, Sapporo, Tokyo","value":"9"},
	{"label":"(GMT+09:00) Seoul","value":"9"},
	{"label":"(GMT+09:00) Yakutsk","value":"9"},
	{"label":"(GMT+09:30) Adelaide","value":"9.5"},
	{"label":"(GMT+09:30) Darwin","value":"9.5"},
	{"label":"(GMT+10:00) Brisbane","value":"10"},
	{"label":"(GMT+10:00) Canberra, Melbourne, Sydney","value":"10"},
	{"label":"(GMT+10:00) Hobart","value":"10"},
	{"label":"(GMT+10:00) Guam, Port Moresby","value":"10"},
	{"label":"(GMT+10:00) Vladivostok","value":"10"},
	{"label":"(GMT+11:00) Magadan, Solomon Is., New Caledonia","value":"11"},
	{"label":"(GMT+12:00) Auckland, Wellington","value":"12"},
	{"label":"(GMT+12:00) Fiji, Kamchatka, Marshall Is.","value":"12"},
	{"label":"(GMT+13:00) Nuku'alofa","value":"13"}
]	

// timezone dropdown
var timeZoneDropdown = $("#timeZoneDropdown").kendoDropDownList({
	optionLabel: "Select...",
	dataTextField: "label",
	dataValueField: "value",
	filter: "contains",
	dataSource: tzInts,
	change: onTimeZoneChange,
}).data("kendoDropDownList");

// Save the selected date in a hidden field.
function saveTimeZoneValue(timeZoneId){
	$("#timeZoneValue").val(timeZoneId);
}

// Calculate the server time
function onTimeZoneChange(e){
	// Get the value
	getServerDateTime();
}//...function onBlogTimeZoneChange(e)

function getServerDateTime(){

	jQuery.ajax({
		type: 'post', 
		url: '<cfoutput>#application.baseUrl#</cfoutput>/demo/Demo.cfc?method=getServerDateTime',
		data: { // arguments
			selectedDate: kendo.toString($("#selectedDate").data("kendoDateTimePicker").value(), 'MM/dd/yyyy'),
			selectedTime: kendo.toString($("#selectedDate").data("kendoDateTimePicker").value(), 'hh:mm tt'),
			timeZone: $("#timeZoneValue").val()
		},
		dataType: "json",
		success: serverDateTimeResult, // calls the result function.
		error: function(ErrorMsg) {
			console.log('Error' + ErrorMsg);
		}
	// Extract any errors. This is a new jQuery promise based function as of jQuery 1.8.
	}).fail(function (jqXHR, textStatus, error) {
		// The full response is: jqXHR.responseText, but we just want to extract the error.
		$.when(kendo.ui.ExtAlertDialog.show({ title: "Error while consuming the getServerDateTime function", message: error, icon: "k-ext-error", width: "<cfoutput>#application.kendoExtendedUiWindowWidth#</cfoutput>" }) // or k-ext-error, k-ext-information, k-ext-question, k-ext-warning.  You can also specify height.
			).done(function () {
			// Do nothing
		});
	});//...jQuery.ajax({
};

function serverDateTimeResult(response){
	// alert(response);
	// The server is returning the time. Save this into the form for display
	$("#serverTime").val(response);
}

Client-Side HTML

<div class="content k-content">
<table align="center" class="k-content" width="100%" cellpadding="2" cellspacing="0">
  <input type="hidden" name="selectedDateValue" id="selectedDateValue" value="">
  <input type="hidden" name="timeZoneValue" id="timeZoneValue" value="">
  <input type="hidden" name="serverTimeZoneValue" id="serverTimeZoneValue" value="">
  <cfsilent>
	<!---The first content class in the table should be empty. --->
	<cfset thisContentClass = HtmlUtilsObj.getKendoClass('')>
	<!--- Set the colspan property for borders --->
	<cfset thisColSpan = "2">
  </cfsilent>

  <tr height="1px">
	  <td align="left" valign="top" colspan="2" class="<cfoutput>#thisContentClass#</cfoutput>"></td>
  </tr>
  <tr height="1px">
	  <td></td>
	  <td align="left" valign="top" class="<cfoutput>#thisContentClass#</cfoutput>">
		Your hosting provider or server may reside in a different time-zone. These settings are critical when this is the case. If your server is in a different time-zone, you will want the post date to show the  time that you are in- not necessarilly where the server is.
	  </td>
  </tr>
  <!-- Form content -->
<cfif session.isMobile>
<tr valign="middle">
<td class="<cfoutput>#thisContentClass#</cfoutput>" colspan="2">
	<label for="selectedDate">Date</label>
</td>
</tr>
<tr>
<td class="<cfoutput>#thisContentClass#</cfoutput>" colspan="2">
	<input id="selectedDate" name="selectedDate" value="<cfoutput>#dateTimeFormat(selectedDate, 'medium')#</cfoutput>" style="width: <cfif session.isMobile>95<cfelse>45</cfif>%" /> 
</td>
</tr>
<cfelse><!---<cfif session.isMobile>--->
<tr valign="middle" height="30px">
<td align="right" valign="middle" class="<cfoutput>#thisContentClass#</cfoutput>" width="20%">
	<label for="selectedDate">Date</label>
</td>
<td align="left" class="<cfoutput>#thisContentClass#</cfoutput>">
	<input id="selectedDate" name="selectedDate" value="<cfoutput>#dateTimeFormat(now(), 'medium')#</cfoutput>" style="width: <cfif session.isMobile>95<cfelse>45</cfif>%" /> 
</td>
</tr>
</cfif>
  <!-- Border -->
  <tr height="2px"> 
	  <td align="left" valign="top" colspan="<cfoutput>#thisColSpan#</cfoutput>" class="<cfoutput>#thisContentClass#</cfoutput>"></td>
  </tr>
<cfif session.isMobile>
  <tr valign="middle">
	<td class="<cfoutput>#thisContentClass#</cfoutput>" colspan="2">
		<label for="timeZoneDropdown">Your time-zone:</label>
	</td>
   </tr>
   <tr>
	<td class="<cfoutput>#thisContentClass#</cfoutput>" colspan="2">
		<select id="timeZoneDropdown" name="timeZoneDropdown" style="width:95%" onchange="saveTimeZoneValue(this.value)"></select>
	</td>
  </tr>
<cfelse><!---<cfif session.isMobile>---> 
  <tr>
	<td align="right" class="<cfoutput>#thisContentClass#</cfoutput>" style="width: 20%"> 
		<label for="timeZoneDropdown">Your time-zone:</label>
	</td>
	<td class="<cfoutput>#thisContentClass#</cfoutput>">
		<select id="timeZoneDropdown" name="timeZoneDropdown" style="width:50%" onchange="saveTimeZoneValue(this.value)"></select>
	</td>
  </tr>
</cfif>	  
  <!-- Border -->
  <tr height="2px">
	  <td align="left" valign="top" colspan="<cfoutput>#thisColSpan#</cfoutput>" class="<cfoutput>#thisContentClass#</cfoutput>"></td>
  </tr>
  <cfsilent>
  <!--- Set the class for alternating rows. --->
  <!---After the first row, the content class should be the current class. --->
  <cfset thisContentClass = HtmlUtilsObj.getKendoClass(thisContentClass)>
  </cfsilent>
<cfif session.isMobile>
  <tr valign="middle">
	<td class="<cfoutput>#thisContentClass#</cfoutput>" colspan="2">
		<label for="serverTime">Hostek Server Time:</label>
	</td>
   </tr>
   <tr>
	<td class="<cfoutput>#thisContentClass#</cfoutput>" colspan="2">
		<input type="text" id="serverTime" name="serverTime" value="" class="k-textbox" required> (Oklahoma)
	</td>
  </tr>
<cfelse><!---<cfif session.isMobile>---> 
  <tr>
	<td align="right" class="<cfoutput>#thisContentClass#</cfoutput>" style="width: 20%"> 
		<label for="serverTime">Hostek Server Time:</label>
	</td>
	<td class="<cfoutput>#thisContentClass#</cfoutput>">
		<input type="text" id="serverTime" name="serverTime" value="" class="k-textbox" required> (Oklahoma)
	</td>
  </tr>
</cfif>
</table>

This entry was posted on June 21, 2022 at 2:40 AM and has received 777 views.

Using Cookies to Pass JavaScript Variables to ColdFusion


Understanding the differences between Javascript and ColdFusion


You can't directly pass a Javascript variable to ColdFusion as the two technologies are quite different.

ColdFusion is processed on the server side prior to delivering the content to the client. ColdFusion prepares the entire page and then renders it to the client before any client-side activity, such as Javascript, can take place.

Javascript is used on the client-side, and these variables are only available after ColdFusion initially delivers the HTML to the client. These two environments can not be running at the same time. 

To pass Javascript variables to ColdFusion, you must an assistive technology, such as Ajax, or pass the Javascript variables to the server-side once the initial page has been rendered. Here we will focus on using Cookies to transfer information from the client-side to the server-side.


Real-world scenario

In Galaxie Blog, I developed a complex create post interface with TinyMce. There are scores of different interfaces depending upon the client's screen resolution and device. I could have used media queries and other client-side techniques to build the page, however, the enormous complexity of the various interfaces made it much easier to design these interfaces on the server-side. 

To accomplish this, I sniffed the client's device by intercepting the HTTP user agent string with ColdFusion scripts provided by detectmobilebrowers.com. This works flawlessly and detects mobile and desktop devices but does not work with newer iPads. Unfortunately, Apple recently removed any identifying strings and made it impossible to detect iPads using the HTTP user agent string.To determine iPad clients, I would have to use Javascript to obtain the screen resolution and pass it to ColdFusion.


Using cookies to pass Javascript variables to ColdFusion

You can use cookies to transfer information from Javascript to ColdFusion. This particular technique requires that the user land on a page, such as a login form, to obtain the needed information from Javascript. 

In my scenario, the user will first hit a login page. The login page has the following Javascripts to set a cookie that ColdFusion can read. Note the path argument ('/') at the end of the script. You must store the cookie that Javascript creates in the root directory for ColdFusion to be able to read the cookie.


Logic on the client-side

/* Cookie functions. The original author of this script is unknown */
function setCookie(name,value,days) {
	var expires = "";
	if (days) {
		var date = new Date();
		date.setTime(date.getTime() + (days*24*60*60*1000));
		expires = "; expires=" + date.toUTCString();
	}
	// The path must be stored in the root in order for ColdFusion to read these cookies
	document.cookie = name + "=" + (value || "")  + expires + "; path=/";
}

Once the user hits the login page, set a cookie using the Javascript function above. We are naming our cookies 'screenWidth' and 'screenHeight' and passing the width and the height of the device determined by Javascript and keeping the cookie alive for one day.

// Set a cookie indicating the screen size. We are going to use this to determine what interfaces to use when the the screens are narrow.
// (setCookie(name,value,days))
setCookie('screenWidth',$(window).width(),1);
setCookie('screenHeight',$(window).height(),1);

Server-side logic using ColdFusion

To read the cookie using ColdFusion, it is best to use a try block to read the cookie. The syntax to read the cookie from Javascript is different than the native ColdFusion cookie methods- note the brackets surrounding the cookie name. 

<!--- Get client properties. This will be used to set the interfaces depending upon the screen size --->
<cftry>
	<cfset screenHeight = cookie['screenHeight']>
	<cfset screenWidth = cookie['screenWidth']>
	<cfcatch type="any">
		<cfset screenHeight = 9999>
		<cfset screenWidth = 9999>	   
	</cfcatch>
</cftry>
<!--- Outputting the screen sizes --->
<cfoutput>
screenHeight: #screenHeight#
screenWidth: #screenWidth#
</cfoutput>

You can use this particular method to transfer any variable obtained by Javascript to ColdFusion as long as you have the user first hit a landing page. 

I may write other articles using other methods, such as Ajax, in the future. 


This entry was posted on June 16, 2022 at 1:08 AM and has received 426 views.

Galaxie Blog 3 is Now Released


I am proud to announce that Galaxie Blog 3 is finally released. It was our goal to build one of the most comprehensive HTML5-based blogging platforms that meets or exceeds the out-of-the-box core blogging functionality of major platforms like WordPress. Take a look and see- with Galaxie Blog 3, I think that you will also agree that we delivered on that goal. 


What is Galaxie Blog?

Galaxie Blog is one of the most full-featured out-of-the-box blogging platforms in the world. 

Galaxie Blog was developed with a mobile-first priority. We have put great emphasis on perfecting your mobile experience where you can manage the blog and create a stunning blog post with just a tablet or a phone. 

It is a beautiful HTML5 web application that has extensive media support and will take the media that you upload and create new media formatted to the major social media platforms like Facebook and Twitter. Galaxie Blog has scores of WYSIWYG editors. You don't need to know any HTML in order to create a beautiful blog post. These interfaces will allow you to upload images, videos, and image galleries, and even create maps and map routes. Galaxie Blog is also perfect for the travel blogger- it offers comprehensive tools to generate and share various types of maps that are free of charge. 

Galaxie Blog is eminently themeable. The blog has nearly 30 different pre-built themes and you can develop your own theme within a few minutes and unique fonts can be applied to any theme. 

Galaxie Blog has extensive SEO features to improve your ranking with the search engines. It also automatically structures your blog data for the search engines using the most modern version of JSON-LD. Galaxie Blog also automatically generates RSS that allows other applications to access your blog posts and create real-time feeds.

Galaxie Blog supports multiple users and user capabilities. There are 9 different user roles and dozens of unique capabilities. You can create new custom roles with unique capabilities. For example, you may assign one user to moderate the blog comments, and another to edit the contents of a post. 

Galaxie Blog supports more databases than any other major blog software and can be used with any modern database

Galaxie Blog can be hosted on any ColdFusion-based server and has an automatic installer that will guide you through the installation process. Typical ColdFusion hosting plans start at 11 per month. 


Why Galaxie Blog?

The other blog software, such as WordPress, offers a vast array of features. However, the choices that you have to make to set up a blog are often quite bewildering. 

The majority of the other blogging systems have what is called a freemium business model. This model provides basic blogging features at no cost but charges a premium for additional or advanced features. Every advanced feature set needs to be researched and purchased separately. Often, you may not be aware that these features are missing until they are needed and you may have to resort to making multiple complex ad-hoc purchases. There are also tens of thousands of proprietary themes, each one produced by different developers, and not all of them are safe or legitimate. Without trial and error, it is impossible to determine if the desired plugins that you have chosen will seamlessly work with your themes.

Galaxie Blog is different. This blog can't offer the breadth of choice that other blogging systems such as WordPress offer, however, everything is tightly integrated and everything will seamlessly work together. Galaxie Blog already has most of these freemium features that require additional purchases built-in. For example, Galaxie Blog has nearly every TinyMCE open-source plugin built-in. There are hundreds of features here from embedding programmatic code to having hundreds of silly emoticons that you can embed in a post. We also have added TinyMCE freemium features.  Galaxie Blog also supports rich image and media support along with the ability to auto-generate a table of contents which now requires an $80 TinyDrive subscription. Additionally, we have added other advanced features such as embedding static maps, maps that display the route between two or more locations, and rich gallery support. Other major freemium features include rendering your images for a perfect social media preview, advanced SEO tools that generate JSON to include rich Google media snippets to your google search results, and branded emails that go out to your user subscription base, and more. All of these freemium features are included for free.

Galaxie Blog has scores of open-source libraries, however, each library has been carefully integrated into Galaxie Blog and will work with all of our themes. For example, the buttons on your videos will take on the primary color of your selected theme. If you embed a map route, the route shown will also take on the primary color of the theme. in fact, nearly every Galaxie Blog widget will is tailored to your selected theme! You're not going to find this tight level of integration in a different blogging system.


Experience Galaxie Blog Yourself

If you want to experience Galaxie Blog yourself, please contact me, provide your full name and email address, and I will set up a free account for you.  I won't give you a sales pitch or bug you, but you can investigate the blog's administrative interfaces yourself. I am requiring an initial contact as I don't want to manage spam and adult content. 

Contact me if you're having any issues with the Galaxie Blog installation. I will try to help you free of charge. I may not be able to help you in all situations, but I will try to respond to you as soon as possible. It is important for me to try to support you.

If you are impressed with this blog, please consider going to my GitHub site and starring this repository. I have spent thousands of hours developing this over the last four years, and it means a lot to me to know that you appreciate my contribution to the open-source community.

Happy Blogging!

This entry was posted on June 9, 2022 at 1:12 PM and has received 928 views.

A note about this documentation

Note regarding this documentation

The next 40 or so posts provide extensive documentation of Galaxie Blogs Administrative Interface and can be searched using the search engine near the top of the page. However, it is not necessary to read all of this documentation. Galaxie Blog is intuitive and most of this information is already found in the Administrative Interface.

This entry was posted on June 1, 2022 at 7:33 PM and has received 246 views.