Gregory's Blog
long meetins stink

Introducing the Galaxie Blog Administrative Site


A Brief Introduction to the Galaxie Blog Administrative Site

Galaxie Blog is a very powerful HTML5 blogging platform and it contains all of the essential tools to create a beautiful and compelling site.

The Galaxie Blog Administration site is used to securely manage your blog and can be accessed by clicking on the user icon near the top of the blog page or by appending '/admin' to the blog URL.

You must have the proper login credentials to access the administrative website. Passwords are encrypted using the highest available encryption standard and plain text passwords are never stored in the database.  

There are over fifty different administrative interfaces, and each interface is carefully designed for both mobile and desktop clients. You can administrate your blog using a mobile or desktop device. There is also native phone functionality, for example, when you are uploading media, can take a picture or use a picture previously taken from your phone.

We have taken great care to intuitively organize the different interfaces. These interfaces are simple and unobtrusive and typically only become available when you need them. 

Galaxie Blog uses a windowing system, similar to Windows or the Macintosh, to open up an interface. The windows have minimize, refresh and close icons at the top right hand of the screen. The minimize icon allows the user to minimize the window to navigate around or open up a new interface. Refreshing the window is handy if you want to set the interface back to its default state, for example, to clear up the filters that you may have applied to an HTML5 grid. 

The site is forgiving and invites exploration. If you erroneously click on a delete button, you will be prompted to confirm the deletion. A new user should be at ease while investigating the interfaces without worrying that something will go wrong.

If you are a site administrator, there are a dozen or so different major interface categories. There are multiple user roles and capabilities, if a user does not have permission or role they will not see the icon to launch the interface. 

Many of the interfaces initially open up an HTML5 grid with links to detail interfaces. Nearly every column in the grid is searchable and sortable. When editing a post, you can search for a partial title to find and open a particular post. We are covering these grids in more detail below.

There are scores of different advanced WYSIWYG Galaxie Blog editors. Each editor has a certain purpose, such as editing a post or uploading an icon for your site. All of the editors are WYSIWYG and offer a real-time preview. We will cover these interfaces in future posts.

This entry was posted on May 20, 2022 at 12:35 AM and has received 301 views.

Galaxie Blog HTML5 Grid Interfaces


Galaxie Blog uses a customized version of jsGrid, a lightweight client-side data grid to find and edit records when administrating the blog. These grids support grid operations like inserting, filtering, editing, deleting, paging, and sorting records, and it is fully customized to match the Galaxie Blog themes. JsGrid has no license restrictions and is fully open-sourced and uses the MIT license.

There are many integrated grids in the Galaxie Blog Administrative site. These grids manage:

  • Categories
  • Comments
  • Fonts
  • Posts
  • Subscribers
  • Themes
  • Users and user login history

Grid Features

This customized version of jsGrid is quite different than the official version and has been heavily customized to match the Galaxie Blog themes. 

Sorting
All of the grids can be sorted and most columns support search operations. To sort a column, simply click on the column header at the top of the grid. 

Searching
The search capabilities are available by typing in a string right underneath the column header and clicking on the search icon in the grid control to the right. The search is case-insensitive and it will match any word that you type into the search field. For example 'Greg' will match 'Gregory'. This is quite useful to find records that you want to edit. Simply type in one or two words for the text that you want to find. 

Opening up the detail interfaces from the grid
Most of the grids are used to display interfaces to edit the detail record. For example, to pull up a post that you want to edit. To open up the detail interface, click on the links within the cells to the left side of the grids. Not all grids have a link to the detail editor, for example, the category grid. Categories don't have enough metadata to support a dedicated detail interface, only the category and alias exist, and all of these editing tasks can be performed within the grid.

Editing
All of the grids support basic editing. While there are some things that require a dedicated interface, such as editing a post, there are some time-saving editing features built into the grids. For example, you may quickly delete records without having to click on a link to open up a separate interface just to delete something. 

To quickly perform edits in an editable column in the grid, click on the edit button at the far right end of the row. After clicking the edit button the editable fields will be displayed. Change the value of one of the fields, and click on the checkmark button to save the record. This is a very fast process and you can immediately move the next record that you want to edit.

Deleting Records
Most of the grids allow you to delete records. Don't be afraid of accidentally hitting the trash can icon which will delete something- you will always receive confirmations before Galaxie Blog deletes anything.

Galaxie Blog Administrative Grids

Category Grid

The Category Grid is used to create and manage existing categories. These categories are used to help categorize your posts.

Adding a new category is easy, click on the Add Category button, type in a category, and click submit. 

The Category Grid contains the following categories: Category, Alias, Post Count, and Date. The category alias is the link that will be shown in the URL. All of the columns are sortable and searchable.

This grid does not have any links to pull up a category detail interface.

Font Grid

The Font Grid is used to manage and create new fonts. There are a lot of font properties and most of the time you will be either creating or finding a font to open the Font Detail Interface.

To create a new blog font, click on the Add New Font button and follow the directions on the screen, or see How to Create New Fonts below.

Currently, we are only supporting woff2 font uploads. This interface will be improved in upcoming versions to support more font types. We also intend on supporting google fonts in the future.

The font name, weight, italic, websafe and use font columns are editable. Other than the Use Font checkbox, all of the other fields are used for display purposes. We will explain the Use Font functionality below.

The Web Safe Font checkbox is used to determine if this font is web safe and available across all browsers. Clicking on this checkbox will activate the font in the Post Editor. Be sure that it really is a web-safe font however, if it is not there will be browser errors.

A font can be assigned to the page body, the title header, and the menu script at the top of the page. Fonts can also be used when making a post in the post editor. You can preview the font by opening up the Font Detail interface before assigning a font to a content block.

if you have assigned a font to a content block using the theme interface, you don't need to load the font in your code, it will be loaded automatically.

If you want a non-web-safe font that is not assigned to a content block to be available in the Post Editor, click on the 'Use Font' checkbox to load the font automatically. However, be aware that loading too many fonts will slow the page down as they consume resources to load.

Post Grid

The Post Grid is going to be the grid that you will most likely use the most while administrating your blog site.

To add a post, click on the Add New Post button within the grid, or on the Administrative site, select a date and time, choose the author, type in the title and description fields, and click submit.

The Post Grid contains the following columns: Author, Title, Post, Date Posted, and Released.

The search functionality will be used quite a bit here. Like all of the grids, typing in one or two words in the Title or Post search field will retrieve all records that match the search words. Searching the Post column for example will search the entire contents of the post.

You can edit the Released property by clicking on the checkbox. Releasing a post will release the post to the public.

To open up the Edit Post Interface, click on one of the links in the Post or Title columns.

Subscriber Grid

The Subscriber Grid is used to display and edit your subscribers. There is no need for a detailed interface here. 

The email, token, and verified columns are editable.

When a user subscribes to your blog, they are sent an email asking for them to confirm their subscription. This is known as a 'double opt-in' and is recommended practice. Once the user confirms via email, the Verified checkbox will become checked.

However, the blog administrator can automatically verify the subscribers by clicking on the verified checkbox. This feature is available as sometimes the subscribers provide their email address in person, or ask the administrator to subscribe for them. 

Theme Grid

The Theme Grid is mainly used to edit the theme details using the Theme Settings Interface. Click on the link in the Theme Name column to open this interface.

To create a new theme click on the New Theme button at the top of the grid.

The Edit Theme Interface will be displayed asking you to enter a new theme name and select a theme that is the closest match to the theme that you want to create.

When selecting the theme that you want to start from, pay attention to the primary colors of the buttons, logos, and the color at the top of the blog post calendar icons when copying an existing theme. You will want to try to match these primary accent colors when choosing new backgrounds and Logos for your new theme.

Once you have entered the new theme name and have selected the current theme, click on the submit button to open the Edit Theme Setting interface. This interface will be covered in future posts.

The Modern Theme, Use Theme, and Selected Theme columns in the grid are editable.

The Modern Theme checkbox is used to set the theme type. The modern theme removes the sidebar to the right of the blog and condenses the content in the center of the page. If this is unchecked the theme is the classical theme type. Classic themes are useful when you want advertisements to be displayed on the right side of your page.

Use Theme will make the theme available to a blog post and be available in the menu. Unchecking this checkbox will remove the theme from the blog.

To make one of the themes your only default theme, click on the selected theme checkbox. Themes that are enabled with the Use Theme checkbox will still be available on the menu at the top of the page.

Users Grid

The users' grid is used to create and edit users. 

To create a new user, click on the Create New Users button at the top of the grid. 

You will need to enter in the user's information, such as their name and email address. The password that you set will not be the user's eventual password. It is only used to initially log the user in once they receive an automated email. 

Once a new user has been made, a branded email will be sent to the user asking them to fill out their own user profile and select their own password. The new user will also have to fill out some secret questions like their favorite pet and place. These questions are only used if the user forgets their password. The user's password or their answers to the questions are not available to the blog administrators.

You will also set the intended role of the new user. There are various built-in Galaxie Blog roles that will be discussed in future blog posts.

You can use the grid to set the first and last names of the user.

To view or edit user details, click on the link in the user name to open up the Edit User Interface.

Login History Grid

Blog Administrators can view the user's login history. This grid will display the user's IP Address, User-Agent, and the date and time that they have logged in. This grid is mainly used to determine if there may have been a security intrusion. There are no editable fields or detail pages associated with this grid. Only the selected user and users with the blog administration role will be able to view this grid.

This entry was posted on May 13, 2022 at 10:29 PM and has received 383 views.

Introducing Galaxie Blogs Edit Post Interface


Galaxie Blogs' Post Interface is one of the most powerful out-of-the-box blog editors that you can find. There are countless number tools and productivity features to allow you to easily craft a beautiful blog post. 

Galaxie Blog has integrated a customized version of TinyMCE in the Edit Post Interface. TinyMCE is free and open-source software and uses the MIT license- there are no upcharges, restrictions, or limits on its usage and no requirement to share source code.

TinyMCE has numerous productivity features such as cleaning up pasted content from Word, Google Docs, Excel, and more. It is compliant with standards and this customized Galaxie Blog version has incorporated rich media support. 

Nearly all of the TinyMCE core plugins are incorporated. Galaxie Blog has also included some of the functionality that is typically found in paid 'freemium' plugins. For example, many of the features in the paid 'TinyDrive' premium plugin to handle media upload capabilities are already built into Galaxie Blog. We have also incorporated functionality that is not available such as embedding Bing Maps, uploading local videos with closed caption and video covers, image gallery support, and more.

There are scores of different Galaxie Blog editors. Each editor has a certain purpose, such as editing a post or uploading an icon for your site. All of the editors are WYSIWYG and offer a real-time preview. Here we will cover two of the main Edit Post interfaces below.

Major Edit Post Interfaces

There are two different major interfaces for a given post:

  1. Enclosure Media Editor

  2. Post Editor, also known as the Tiny Post Editor

Note: don't confuse Edit Post Interface and the Tiny Post Editor. The Edit Post interface contains scores of interfaces to edit the post whereas the Tiny Post Editor is one of the interfaces within the Edit Post Interface.

Enclosure Media Editor Feature Summary

An enclosure is an oversized image or media that is placed at the top of a post. It is often called a hero image as it captures the attention of the user when viewing a post. The enclosure editor is different than the post editor and handles different types of media. This editor may be used to attach the following media:

  1. Drag and drop interface to upload videos from a local source.  
  2. Embed videos from an external source, such as YouTube or Vimeo
    • Videos may also have:
      • A video cover poster (an image that covers the video when it is not being played)
      • WebVtt Captions can be applied to uploaded videos using the WebVTT Galaxie Editor.
  3. Drag and drop web-friendly images, such as .jpg, png, gif, webp, etc.
    • You can upload or include images from an external source.
      • If you upload an image, Galaxie Blog will try to automatically create the following images:
        • Optimized image for Facebook sharing
        • Optimized image for Twitter
        • 3 different images optimized for the Google Search Engine (used to display images in Google search results)
        • Creates thumbnail images for Galaxie Blog preview
      • Upload images may be edited within the browser. The following actions may be taken: change image orientation, brightness, contrast, gamma, flip image horizontally or vertically, etc, 
  4. Create static maps with various options
  5. Create map Routes showing the path of an intended travel route. A route can have two or more destinations (with a max limit of 12). 

Summary of Tiny Post Editor features

The Tiny Post Editor handles the editing and authoring of blog post content. The post editor contains the following major features:

  1. Undo/Redo
  2. Various paragraph formatting.
  3. Bold, italic
  4. Alignment tools (center, left justify, center, etc)
  5. Bulleting tools and indentation
  6. Link and anchor tools
  7. Special characters
  8. Source code
  9. HTML tables
  10. Code samples for the dozens of programming languages 
  11. Image editing of current embedded images
  12. Insert Media (videos and images)
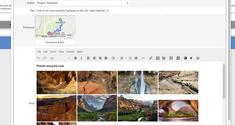
  13. Upload and create image galleries using a drag and drop interface. 
    • The Gallery upload interface allows you to use images saved locally or to use your camera on your device if available. 
  14. Create Static Maps
  15. Generate Map Routes containing two or more destinations

Other Edit Post interfaces and concepts

Along with the enclosure and inline post WYSIWYG editors that were just covered, there are a few other Edit Post interface concepts that we should cover:

  • Release Post means that the post will be public. A post cannot be seen by non-administrators until it is released.
  • The post date may include past or future dates. If a post date is in the future you will have the option to automatically schedule the release of a post.
  • The Post Header contains optional Galaxie Blog Post Directives. These directives are used to attach a javascript to a post, include a ColdFusion template with a cfinclude, embed responsive videos, and manually set the properties of the meta tags used for SEO among other things. See Galaxie Post Directives for more information below. 
  • The JSON-LD button opens up the JSON-LD editor which can be used to manually set the JSON-LD. JSON-LD is automatically generated by Galaxie blog for SEO purposes. 
  • The Promote checkbox will highlight and promote a post to the top of the page. 
  • Change Alias will allow you to change the friendly name in the URL.
  • Use the Related Posts dropdown to show the related posts underneath the blog post. 

We will elaborate on the other features in future articles and posts.

Editor Notes: 

  • All editors will automatically create a preview of the media within the editor, even for videos and maps!
  • Be careful when uploading large videos or images. The max file size generally is around 8MB. If you have larger images or videos, you can upload them manually with an FTP client and link to them using the Enclosure Editor. 

This entry was posted on May 11, 2022 at 12:10 AM and has received 265 views.

Adding images and videos to a blog post


It is trivial to add media to your blog posts using Galaxie Blog. Galaxie Blog can upload popular image formats such as .png, .gif, and .jpg and handles embedded media such as QuickTime, Flash, ShockWave, RealPlayer, and Windows Media Player. 

All of the media are responsive and will look great on all devices.

You may insert media in both the Enclosure Image Editor and the Tiny Post Editor. The enclosure image editor is used to attach the media at the top of the post and is also known as the hero image as it captures the user's attention. You may also include media inline in a post using the post editor. 

If you upload an enclosure using the Tiny Post Editor, Galaxie Blog will take the media and create optimized images/videos for social media sharing. Both editors will allow you to make minor image adjustments such as cropping or rotating the images.

This article will cover the following two interfaces to insert media. 

  1. Insert/Edit Image
  2. Insert/Edit Media

These two interfaces are used numerous times throughout the Galaxie Blog application and you should become comfortable with them.

There are more interfaces to insert media, such as uploading a local video and inserting image galleries and maps, but we will cover these interfaces in later blog posts. 

1) Insert/Edit Image Interface

To open the insert edit interface, click on the square icon with the mountains. Alternatively, you can select Insert - Image.

The Insert/Edit image interface can be used to:

  1. Link to an image by entering the URL into the source field.
    1. You can enter the alternative description for each image.
    2. If the image exists, the interface should provide an automatic preview.
    3. The image height and width should auto-populate when the image is found. 
  2. Upload an image located on your local device (both mobile and desktop clients).
    1. You can drag and drop the image to upload.
    2. You can also browse for an image, or use the camera when using a mobile device.
      • For best social media sharing results, you should try to use an image having at least 1200 pixels wide by 675 in height- landscape images work best.
      • Make sure that the image is compressed. The uploader may fail if the image is too large.
      • Only valid HTML5 image files will be displayed when using the finder.
 

Image Editing

Any image that is placed can be edited by clicking on the image and clicking on the edit image icon. The available image editing tools are generally simple sliders or easily understood icons such as rotate left, right, etc. The following editing features are available:

  • Crop
  • Resize
  • Orientation
  • Brightness
  • Contrast
  • Color Levels
  • Gamma
  • Invert

2) Insert/Edit Media

To open the insert edit interface, click on the square icon with an arrow pointing towards the right. Alternatively, you can select Insert - Media.

The Insert/Edit Media is used for media other than images such as HTML5 video.

This editor behaves similarly to the Insert/Edit Image interface with a few caveats:

  1. If you use a URL to a YouTube or Vimeo video, the video will preview inside of the editor using the vendor's native player.
  2. You may enter an alternate source that will be used as a fallback source.
  3. Image posters can be included that will cover the video until it is being played. 
  4. Like the Insert/Edit image interface, if used as an enclosure, Galaxie Blog will prepare the video to share on Facebook1 and Twitter. 
  5. You can include as many videos within a blog post as you would like.
  6. You may not upload local videos using this interface. However, you may use the upload video interface in the Enclosure editor which will be covered in another blog post.
 

Videos can be inserted from multiple external sources such as YouTube and Vimeo

YouTube Video:

1 Note: there is a relatively recent bug with Facebook that prevents YouTube and Vimeo video content from playing when shared. See https://developers.facebook.com/support/bugs/364444227315183/

This entry was posted on May 3, 2022 at 12:46 PM and has received 276 views.

Upload and host your own videos with Galaxie Blog


Galaxie blog allows you to upload and play your own videos. Your video will be placed at the top of the blog post and will capture your readers' attention.

This interface will also allow you to create closed captions (CC) on top of your video using a WebVTT File, and to cover your initial video with an optional image.

To upload a video that will be made at the top of your blog post, log into the administration site, find your post and open the Edit Post Interface, click on the Enclosure Editor, and click on the image of the camera that is labeled 'upload video', alternatively, you can select Insert - Upload Video using the Enclosure Editor.


Make sure that your videos are compressed, especially when you are using a hosting provider. The images will fail to upload if they exceed the server's upload settings.

You can drag and drop an HTML5 video on top of the upload video interface, select a video from your system, or use your camera. If you are browsing for a file only valid HTML5 video formats will be shown.

  • The uploader should provide a preview of the video with the name of the file.
  • You can add the video title by clicking on the pencil icon underneath the video. 
  • If you chose the wrong file, click on the x icon on the video to remove it and choose another video. 

If everything looks good, click on the Upload File button below.

Once the video has been uploaded, a message will be displayed notifying you that you can add closed captions and create video image covers. After closing the dialog a video preview of your video will appear.


Adding closed captions to your new video

Closed captions may be added to videos that you have uploaded by uploading a WebVtt file. 

A web VTT file is a simple text file and is easily constructed. It looks something like this:

WEBVTT - This file has cues.

14
00:01:14.815 --> 00:01:18.114
- More folks need to like Galaxie Blog on Gregory's git hub project.

15
00:01:18.171 --> 00:01:20.991
- Its an awesome project

16
00:01:21.058 --> 00:01:23.868
- [ pleading ]
- Please like my project!

Now that this little screed has been made, let's go through the steps to create your closed captions.

Before processing, check to see if your web server needs to have support for the following mime type: text/vtt. Consult your web server administrator for more information.

  1. Create your web VTT file using a text editor. 
  2. Save the file with a .vtt extension.
  3. Click on the CC icon labeled Upload WebVtt File, or click on Insert - Upload WebVTT file.
  4. A WebVTT Editor will be pulled up.

Once the Web VTT Editor is displayed:

  1. Click on the arrow icon to upload the VTT file that you have saved.
  2. Another uploader interface will be shown.
  3. Drag or drop the WebVTT file on top of the new interface, or use the finder to select the WebVTT file.
  4. Click on the upload button.
 

Adding an image to cover the initial video

The video image cover will cover the video in its initial state and disappear when the video is being displayed.

To add a video image cover:

  1. Click on the Upload Image Cover icon in the Enclosure Editor, or choose Insert - Upload image cover,
  2. A new Insert/Edit Image interface will be pulled up. Here, there is only one 'Insert/Edit Image icon to upload your image cover. 
  3. Either upload a new image or specify the external URL to the image that you want to serve as the video cover.
  4. If you are uploading, select the image that you want as the image cover and click on the submit button.
  5. Your video should be previewed with your new image covering the video.
 

This entry was posted on May 3, 2022 at 12:07 PM and has received 320 views.